Hi,
Maybe someone can shed some light on an issue I’m facing when computing interferograms using Snap 12.
I have the following processing chain described in the TOPS Interferometry tutorial (link):
TopsarSplit->ApplyOrbit->BackGeocoding->ESD->Interferogram->Deburst->MultiLook->Subset->Snaphu Unwrap->Phase2Displacement->Terrain Correction->GeoTiff Export
Now I get different results when I choose different bursts that cover the region of interest.
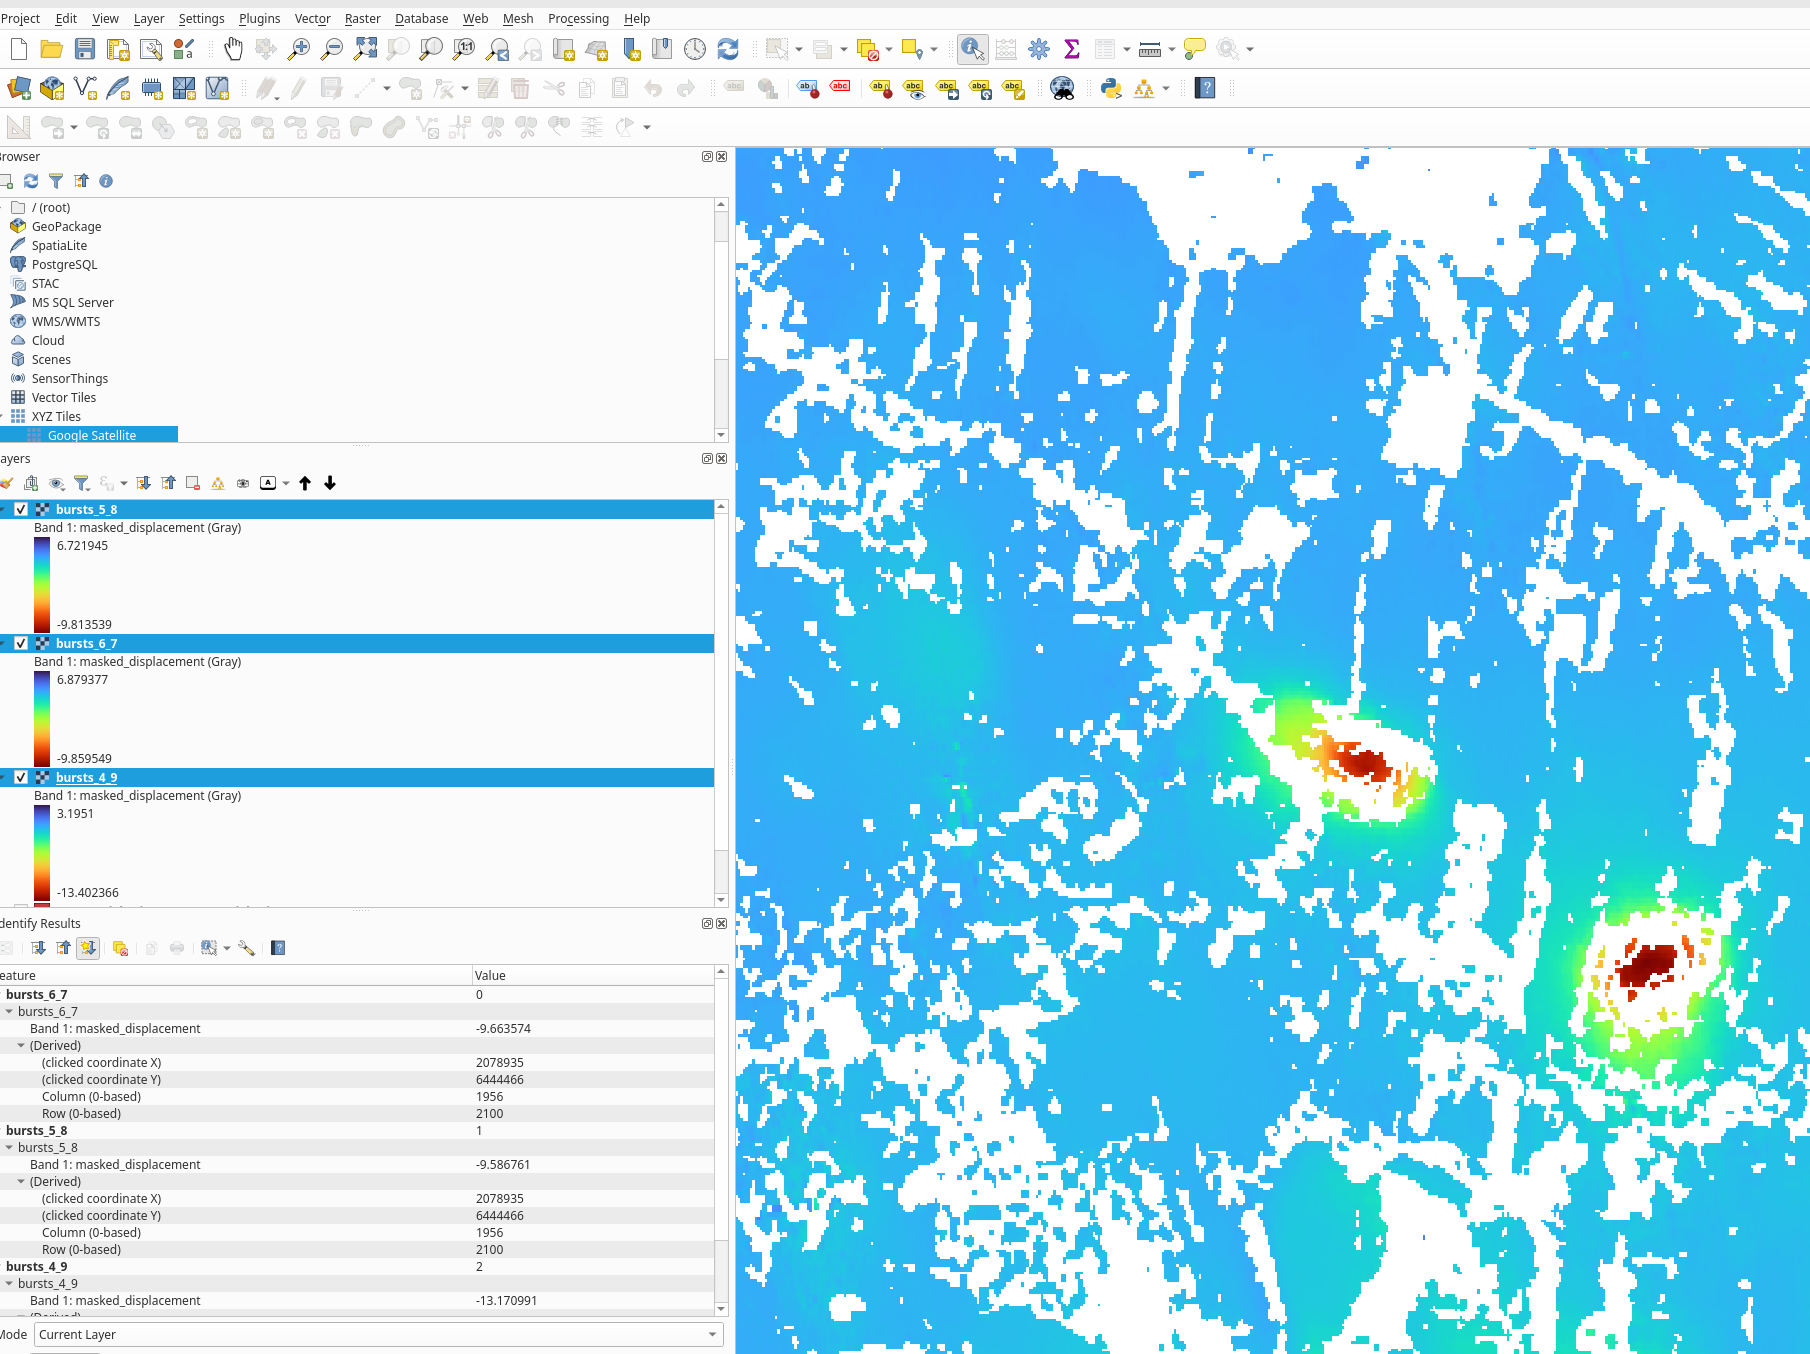
Using bursts 6&7 (which already cover the ROI fully):
I get a displacement range of -9.81cm to 6.72cm
Using bursts 5-8, the displacement is roughly the same: -9.86cm to 6.88cm
but using bursts 4-9, the displacement is significantly different: -13.40cm to 3.20cm
As far as I can tell, the step that introduces the first difference is the Interferogram.
Is this behaviour expected and which of those ranges is considered more “accurate”?
The picture below shows a section of the ROI and I chose one point in the centre of the dark red spots to illustrate this behaviour.
The reason why I am using additional bursts is due to the fact that sometimes subsetting does not cover the whole roi and I am working with an extended region that ensures that I can crop to the right size at the end of my processing chain.
I’m a bit baffled that using more bursts should affect the end result so much…
Kind regards,
Steve