How to install SNAPHU on Mac OS X?
How to install SNAPHU on Macbook OS X for SAR Interferometry?
How to do dInSAR Phase Unwrapping using SNAPHU on Mac OSX?
How to Configure SNAPHU for SNAP on Mac OS X?
On Mac OS X:
After making the interferogram and filtering it inside the ESA Sentinel Application Toolbox (SNAP)
- Go to Radar > Interferometric > Unwrapping > Snaphu Export
and select the interferogram file in the Source Product. The click on “Snaphu Export Tab” and chose the output file directory.
Sometimes when you select the “Target Folder” it opens it and doesn’t returns to Snaphu Export Menu. For that just type filename as any random characters you like and click on select. For instance, I have typed abc and then clicked on Select
After doing that remove the /abc suffix from the directory path
Leave the rest of the settings be and click on Run and wait for the export to complete.
- Now close SNAP and download this file and extract the tarball tar.gz file
https://web.stanford.edu/group/radar/softwareandlinks/sw/snaphu/snaphu-v2.0.3.tar.gz
Open Terminal on Mac and access extracted tarball folder on terminal like so.
Mine is on Desktop so I did this way. Your path may vary
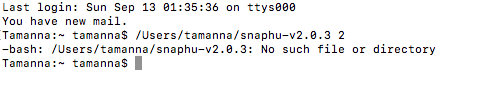
cd /Users/muddasirshah/Desktop/snaphu-v2.0.3 and press enter
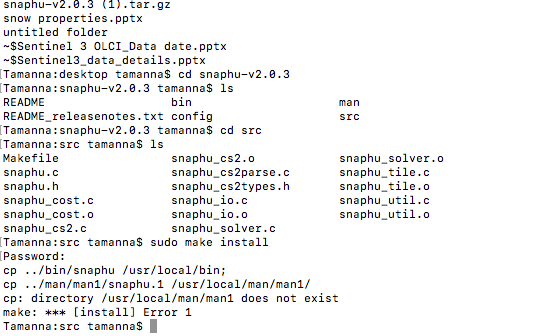
Type ls to show the list of items inside the folder
Now type cd src to access the src folder
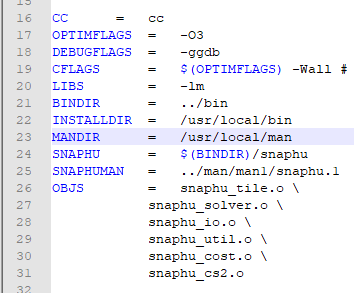
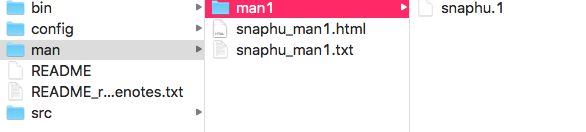
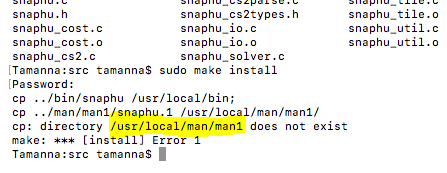
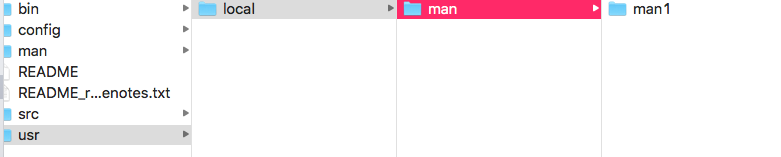
Type sudo make install and press enter. SNAPHU will be installed and copied to system binaries (bin) folder
Once done type which snaphu and press enter it has to show you snaphu in bin directory and show you this path /usr/local/bin/snaphu If error prompts that means snaphu is not installed and change your system permissions. But that happens rarely. Here’s what should appear when you type which snaphu command

Type cd to navigate to home directory also type clear to keep the terminal interface clean.
- Minimize Terminal and navigate to the directory where you exported the files using snaphu export wizard. You will find a file named snaphu.conf
Open it with a text editor
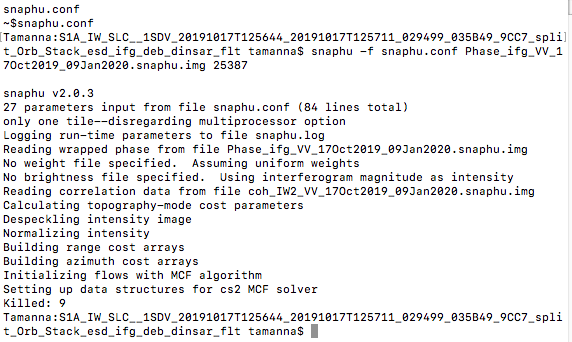
just copy the code below the #command to call snaphu for your respective image and close the file. Don’t save any changes. The code should be like this snaphu -f snaphu.conf Phase_ifg_VV_28Mar2010_02May2010.snaphu.img 5191
now maximize the Terminal Window and paste the code you copied and press enter. The unwrapping process will start and will take some time depending on the image and processing parameters you gave while exporting the interferogram files. Mine took about one and a half hour for a single look complex SLC image. Close other tasks like browser music etc
-
Once the process finishes close terminal and navigate to your Home Directory. The unwrapped img and Header (hdr) file are inside this folder. Close this folder
-
Now open SNAP again and go to Radar > Interferometric > Unwrapping > Snaphu Import
In the Read Phase Menu select the original file wrapped file (interferogram file) phase hdr not the snaphu exported version.
In the Read Unwrapped Phase Menu select the unwrapped file hdr it will have the prefix unw
and is present in the home directory not to mention again
In the SnaphuImport Menu tick the box
In the Write Menu just chose the output folder and file name of your choice.
Give the process some time and SNAP will load the file in product explorer.
Import the Wrapped phase image and open the phase bands
Tile them evenly by Clicking Window > Tile Evenly
Here’s my result Left : Unwrapped Phase, Right : Wrapped Phase

On Windows:
-
Download and extract SNAPHU v2.0.3.tar.gz from the link standfored link provided above
-
Open SNAP and go to Radar>Interferometric>Unwrapping>SNAPHU Export
-
Select the Interferogram file and give the output Target folder and click on Run
-
Once the Export Process completes Minimize SNAP and go to the folder where you Exported.
Copy all the files (not the folder) -
Open the extracted SNAPHU folder that you downloaded and paste the copied files inside the bin folder. A file named snaphu.conf will be inside the bin folder. Open it with a text editor and just copy the code shown
-
Click on the address bar and type cmd. MS DOS prompt will open, paste the code you copied from conf (config) file and press enter.
-
Unwrapping process will start and will take time
-
When complete new files with the prefixes unw will be present inside this folder
-
Now open SNAP again and go to Radar > Interferometric > Unwrapping > Snaphu Import
-
In the Read Phase Menu select the original file wrapped file (interferogram file) phase hdr not the snaphu exported version.
In the Read Unwrapped Phase Menu select the unwrapped file hdr it will have the prefix unw
and is present in the home directory not to mention again
In the SnaphuImport Menu tick the box
In the Write Menu just chose the output folder and file name of your choice.
Give the process some time and SNAP will load the file in product explorer.
Import the Wrapped phase image and open the phase bands
Tile them evenly by Clicking Window > Tile Evenly
Here’s my result Left : Unwrapped Phase, Right : Wrapped Phase
Thank you
Credits:
Muddasir Shah (MS in Remote Sensing & GIS | Institute of Space Technology, Islamabad)
For Queries please send an email
muddasirshah@outlook.com
Special Thanks to
Prof. Dr. Waqas A. Qazi (GREL - Institute of Space Technology)
waqas.qazi@grel.ist.edu.pk