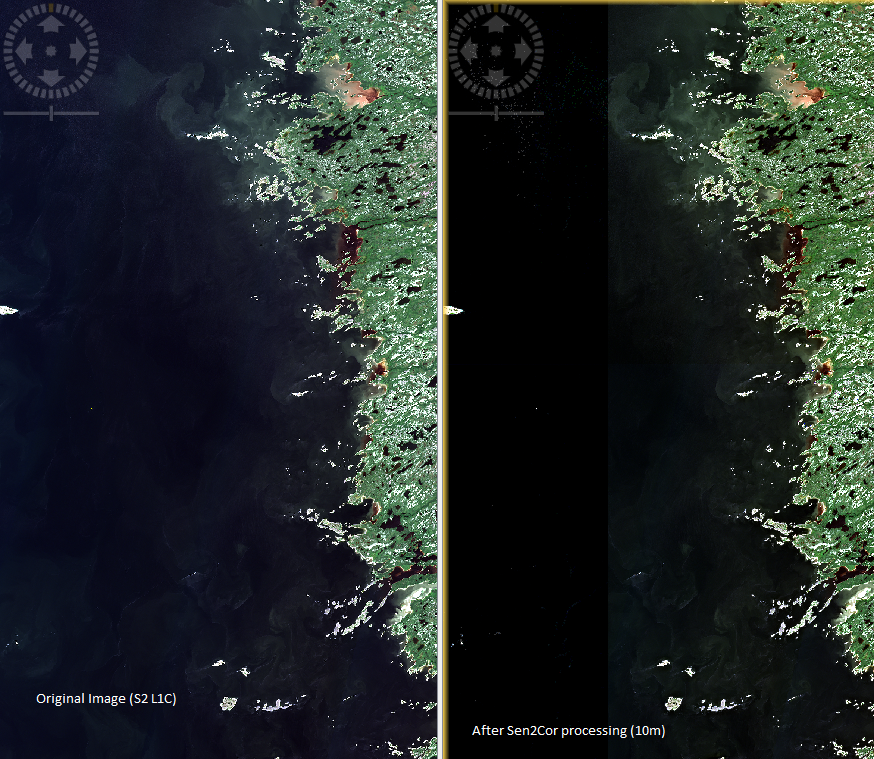
I’ve successfully processed an S2 image over my study site using sen2cor at 10m resolution. However, there’s something odd with the results. The corrected image had a sharp gradient or band of pixels that looks different than the rest of the image. The result does not look seamless and it seems the sen2cor algorithm is producing an inconsistent result over the image. Any info on this issue and how to correct it?
Hi,
does the input image contain only one tile or more? Here it is explained why there could be differences in the tile border when working with multi-tile products:
Thanks again, yes, it consist of different tiles. From the discussion below, it seems that the problem has not been addressed. For I think, I’m OK with the images for now. I’ll do a comparison between TOA and Sen2cor outputs and see if the difference matters.
it seems you are interested in the water surface. You can try to reprocess the left image to obtain better results for it. Look into the logfile for the processing of the right image for the final visibility and set this visibilty as start visibility for the processing of the left image (Visibility in the cfg-file). Additionally set VIS_Update_Mode to 0 (constant) in the cfg-file.
Yes, I’m using S2 images to study coastal water quality and looking for practical and repeatable solutions to map different parameters. However, it seems the results of sen2cor corrections were not as I expected.
Thanks for your suggestion. Could you please elaborate on the process?
First, how do I select only the left image and where should I look for the log files; in the processed image (sen2cored) or in sen2cor/snap settings?
I assume you are using Sen2Cor 2.3.1 which is the latest public version and you are using a product of the old product format (PSD13) which contains multiple tiles.
The processing log-file is generated by the sen2cor processor and has nothing to do with the snap-toolbox. It is named S2A_USER_PRD_MSIL2A_PDMC_ … _report.xml and located in the root directory of the L2A-product. The logfile is generated with the default configuration setting which sets the log-level to INFO in the sen2cor cfg-file: <Log_Level>INFO</Log_Level>.
Open the logfile in a text editor and make a search for the tile name of the tile containing the land surface. Note the process ID given in that message. This process ID is given for all following messages with regard to processing this tile.
Then make a search for “Final vis” and you find the final visibility for processing the land tile. Check that you are extracting the final visibility for the correct tile (process ID).
Now open your cfg-file and set
<VIS_Update_Mode>0</VIS_Update_Mode>
xxx
Where xxx is the value of final visibility you found in the step before.
Last start processing with Sen2Cor stepping to the granule folder and specifying the folder for the water tile to process as input product for sen2cor.
I recommend doing the whole processing from the command line outside snap-toolbox. You better see what happens and during processing you can use snap-toolbox for any other work.
Kind regards
Bringfried
————————————————————————
Deutsches Zentrum für Luft- und Raumfahrt (DLR) - German Aerospace Center | Earth Observation Center | Remote Sensing Technology Institute | Photogrammetry and Image Analysis | Team Marine Remote Sensing | Rutherfordstrasse 2 | 12489 Berlin | Germany
Yes, I’m sen2Cor 2.3.1. I’m a newbie to the command line processing but I’m reading on it.
I’ll keep you posted of my progress in implementing your process. Thanks a lot for the explanation.