I am working with Sentinel 1 in a mountaineous area. So far I am using the terrain tools to align the sensor information with the terrain. But this gives me a raster that has some serious smearing in those areas that lie in the shadow areas. Is there a way to identify those areas and just fill them with no data?
You can apply the SAR Simulation Terrain Correction instead of RD. It optionally produces a layover and shadow mask you could then use in band maths to make these pixels NaN in the SAR image.
1 Like
I have created layover and shadow mask. In this mask, I am interested in NaN pixel (which are valid pixels) and want to convert into 1. All the remaining pixel should equate to zero. I have tried this in band math. But, unable to get the result.
Suppose, ‘A’ is the image on which I want to apply the mask ‘B’. Now which band math expression I should use such that the final output ‘C’ should create an image with valid pixel of ‘A’ when ‘B’ has NaN values.
I would say
IF B == 1 THEN A ELSE NaN
1 Like
The mask doesn’t contain 1 value instead it has NaN. So how can I convert the NaN value of the mask (B) into 1 and remaining into NaN or 0.
I have carried out following expression in band math but it is not working.
case-1: if B==NaN then A else 0
case-2: if B== NaN then A else 1
It produces output band with NaN values and 0 in case-1.
It produces output band with NaN values and 1 in case-2.
But, still the NaN pixels are present in both the cases.
apply this to your mask:
mask == NaN
This will give you a new raster with 1 wherever the mask is NaN and 0 at the other pixels.
Other pixels are zero after the mask == NaN, but the NaN pixels are still NaN
you can un-check “No-Data Value Used” nodata value in the band properties or change it’s definition. Make it -99, for example and save your product. As long as it is defined as 0 you will not be able to see these pixels.
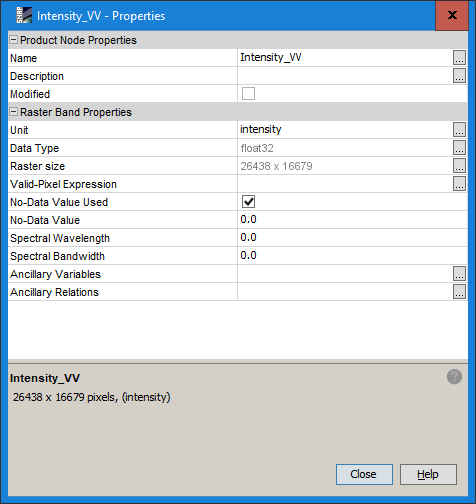
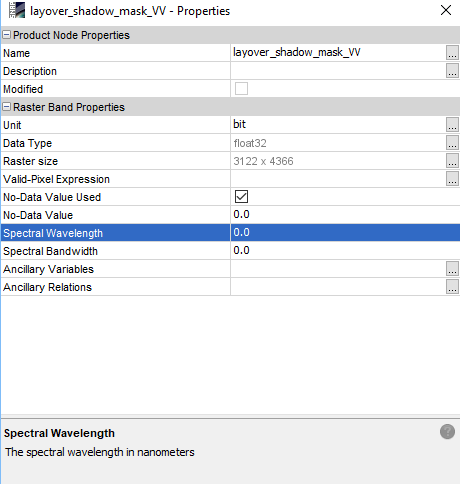
the layover and shadow mask is the output of SAR simulation in SNAP. The properties of the mask is shown in figure below
so what happens when you un-check “No-Data Value Used”?
I modified the properties as given below

After this change I noticed that the NaN values are replaced by 0 instead of 1.
then I wrote the expression in Band math: if layover_shadow_mask_VV == 0 then Simulated_Intensity_VV else 0
and it gives the correct results.
Whenever there are layover and shadow in the image, it returns NaN value and wherever there are no shadows and layover it returns the intensity value.
sorry it is hard to understand without any visual information. If you still struggle with something and need help, please provide some screenshots so we can view the issue and think together about it.
1 Like
Thank you for the discussion.
These areas are transparent as long as they have the same value as the defined no data value. You can
- change the NoData Value OR
- disable it
in the layer properties.
1 Like
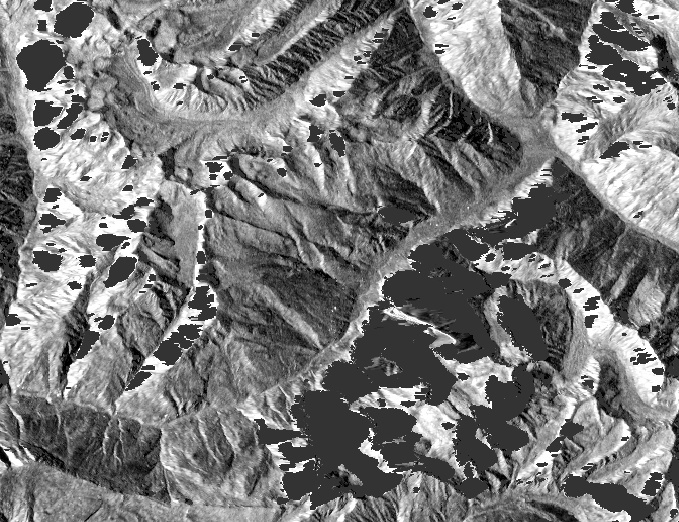
So far the results are good. I am able to separate the shadow and layover areas in the final output. Thank you, Andreas.
good to hear!