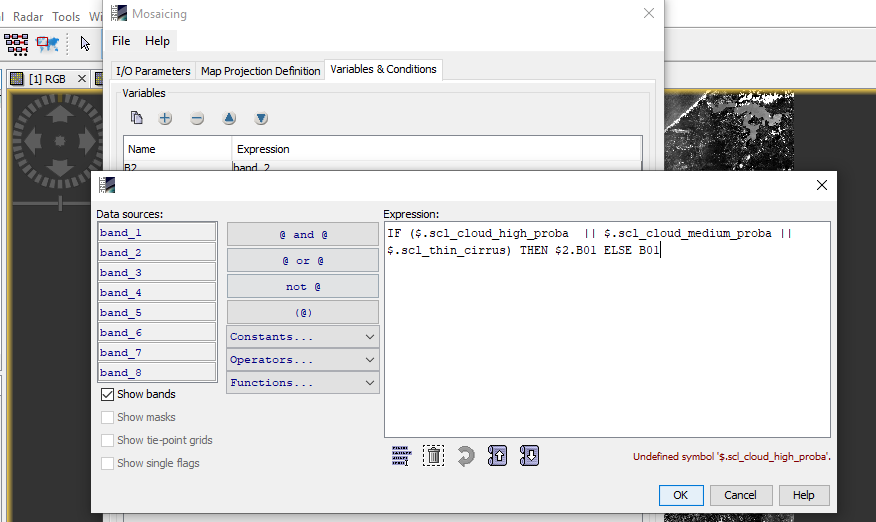
for band 2:
IF $1.cloud_mask == 0 THEN $2.B2 ELSE $1.B2
(given that the mask is 0 in clouded areas, otherwisee you have to adjust this value)
for band 2:
IF $1.cloud_mask == 0 THEN $2.B2 ELSE $1.B2
(given that the mask is 0 in clouded areas, otherwisee you have to adjust this value)
@ABraun, Thank you so much. I am trying to do so.
Hey, could you please share with us the steps for cloud masks creation?
I have a Sentinel 2A L2A image that has clouds and I want to mask them.
@Rim: Your rasters should not be named band_1, band_2 ect. in SNAP. If you import the L2A product they should have correct names and also there should be quality bands in the product.
You can then check “show masks” in the band maths to create your expression, but currently the statement refers to raster names which are not there.
Have you done anything before applying the band maths?
I haven’t done anything so far besides importing my raster image to SNAP
Where did you download it and how did you import it?
Make sure you import it via File > Import > Optical > Sentinel-2 > L2A
I downloaded it from the scihub.copernicus website.
If I try to go file>import>optical sensor>sentinel2>L2A when browsing for the image. I can’t find it.
File/Import/Optical Sensors/Sentinel-2/S2-MSI L2A
The file you should open is the *.xml
which snap tool would be more useful to apply a cloud mask to sentinel2 products, and eliminate the value of clouds of clouds and shadows
I appreciate any input
please have a look here:
Can you tell me than how can i use cloud mask on NDSI image which i have calculated using S2A MSIL1C?
You can apply Idepix to your L1C products: Optical>Preprocessing>Masking>Idepix
Hello!! appreciated StephP
After the fourth point I don’t understand you, you could be more specific. Thank you
Hello Abruescas
Thanks for your input, I would like to know what parameters I should use the idepix tool to remove the value of the pixels from the clouds in an S2A-Misilc image.
Thanks in advance.
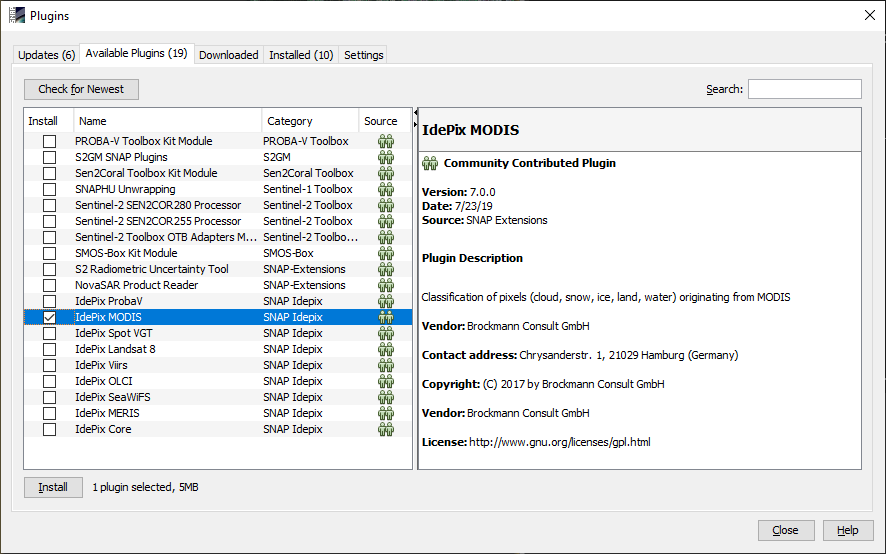
How can i apply idepix to MODIS products
you first install it via the Plugins menu
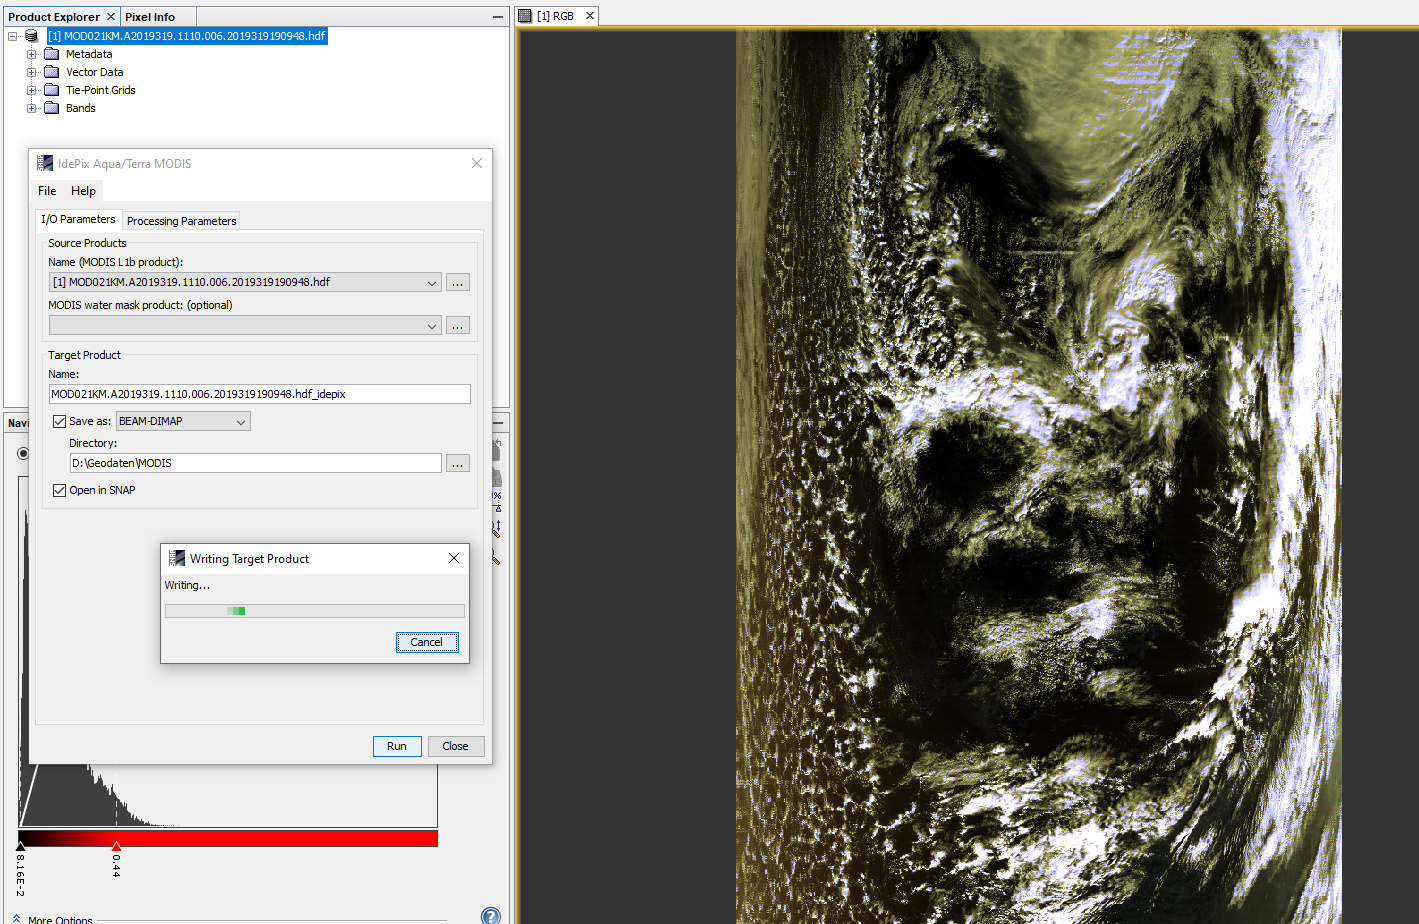
Make sure you download MODIS L1B Calibrated Radiance products: https://search.earthdata.nasa.gov/search?q=MOD021
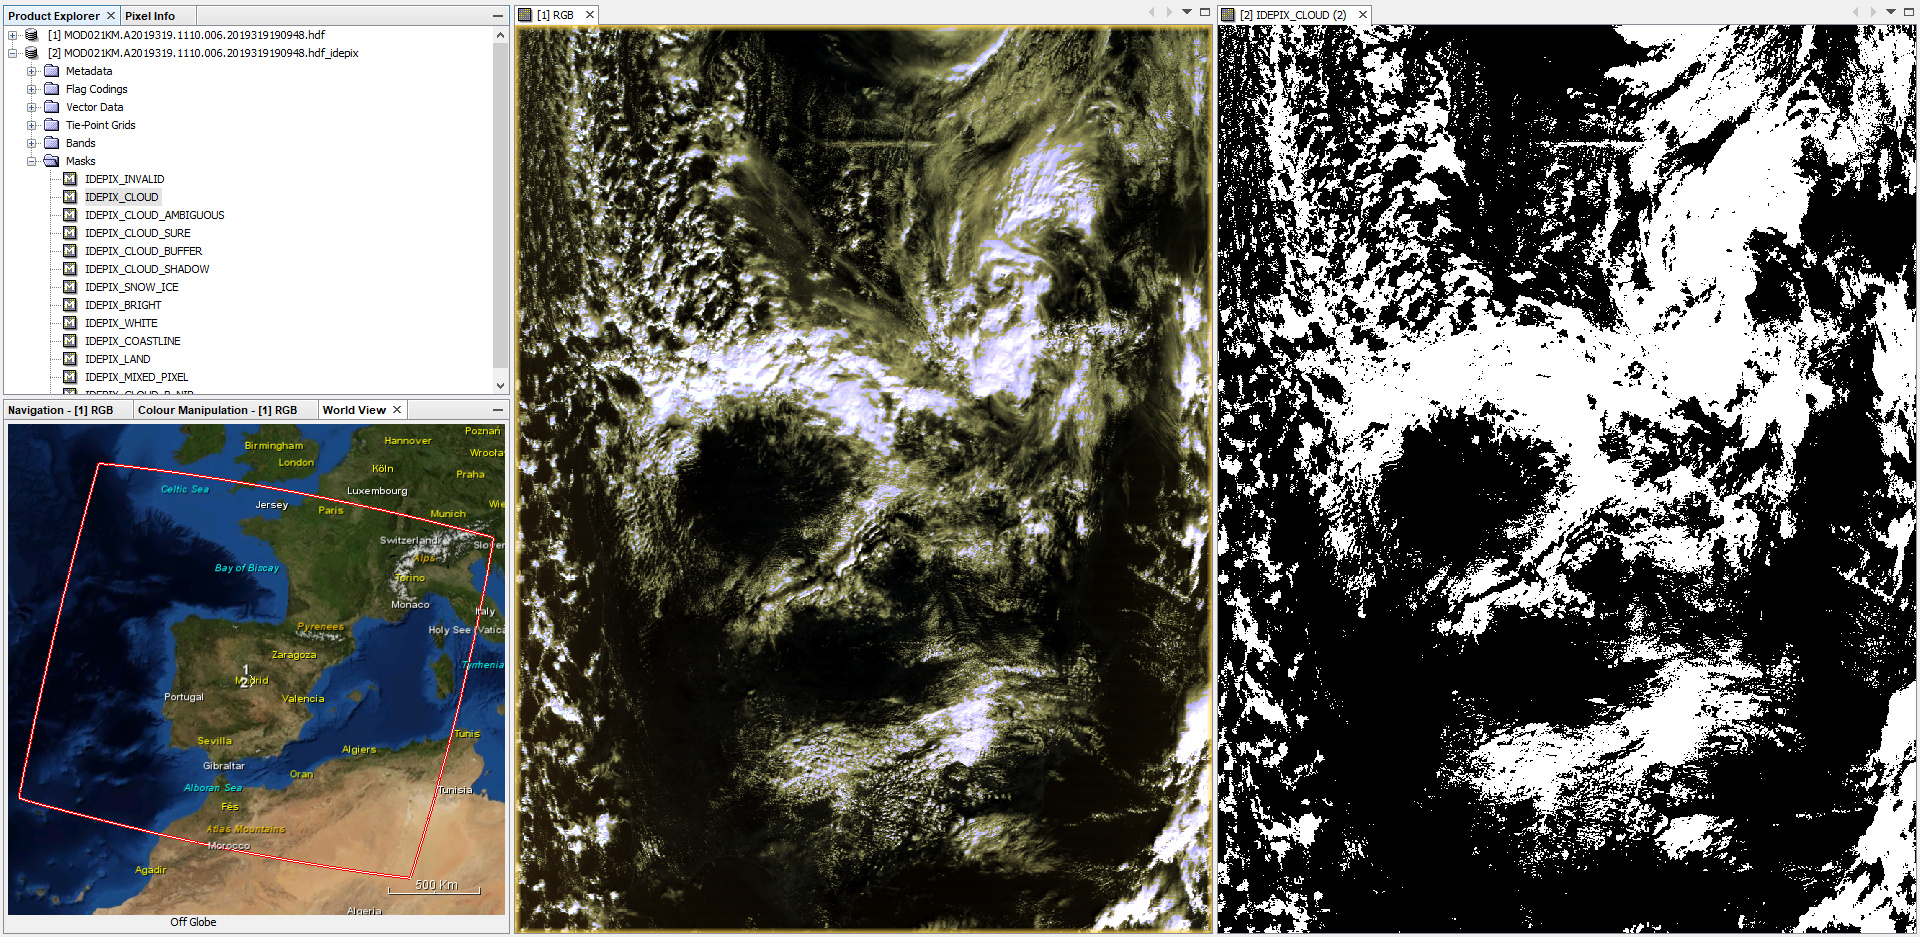
Then you apply IDEPIX
Help!!
I have the following problem, I already applied cloud mask with idepix to sentinel 2 and modis, remove the value of the pixels corresponding to the clouds using the Band-Math tool, save in the default Snap format (Beam-Dimap) but when opening them In the Sig Qgis tool the cloud masks do not appear, and the pixels of the clouds are still there, it is as if nothing had been done. I tried to save and use another format I tried with Geo-Tiff format but I only get one file with the information of all the bands, and I want the bands to be individual (one file for each band) also that the pixels of the clouds do not interfere with the other pixels and be able to visualize the results in another Sig tool to verify.
I appreciate any input.
QGIS cannot read the valid-pixel expressions or masks which belong to a BEAM DIMAP product, they are only used in SNAP. For QGIS the raster is simply a matrix with values. GeoTiff also doesn’t store such metadata.
If you want to permanently remove these values, you have to replace the raster values, for example in the band maths.
IF band_1 == mask THEN 0 ELSE band_1
This replaces any pixel within the mask by zero . If you then open the raster in QGIS you can set 0 as the NoData value (in the transparency tab): S1 tile in QGIS: Zero values
Thank you very much Abraun, it has been very helpful