Hi Tran,
I’d like to ask you two questions regarding to your processing,
The first one, Why you didn’t apply ESD?
and the second, why you don’t postpone datasubset after math Deburst step?
Hi Tran,
I’d like to ask you two questions regarding to your processing,
The first one, Why you didn’t apply ESD?
and the second, why you don’t postpone datasubset after math Deburst step?
my suggestion was to open all intensity bands after you applied split and orbit files. If all show an image, you can proceed.
You can check if all bands of your back-geocoded stack contain information by making RGBs as described here: Fault marking by InSAR Data and difference between SLC_1SSV and SLC_1SDV?
If the images are not properly aligned, the interferogram will fail. Based on your information, it rather looks like some dates remain empty after back geocoding.
All the workfow needed by Trannick can be done automatically with the snap2stamps package.
See our latest publication using it on: https://www.mdpi.com/2072-4292/11/2/129
snap2stamps package available at: https://zenodo.org/record/1322353
All this is open and free just for helping scientist to re-invent the wheel, and go faster on their researchs.
I hope this helps!
Hi Falahfakhri, your first question (Enhance spectral Diversity ) provide a pixel or sub-pixel short to improve co-registration, but I’m not sure here"Just follow some step from this workflow between SNAP and Stamps in this forum
Second Question Datasubset, I think that will the same, because subset just help you choosing interested area for your study, but in my case I can not debursting for next step facing with error. I hope answer some point of your two questions
Thank you
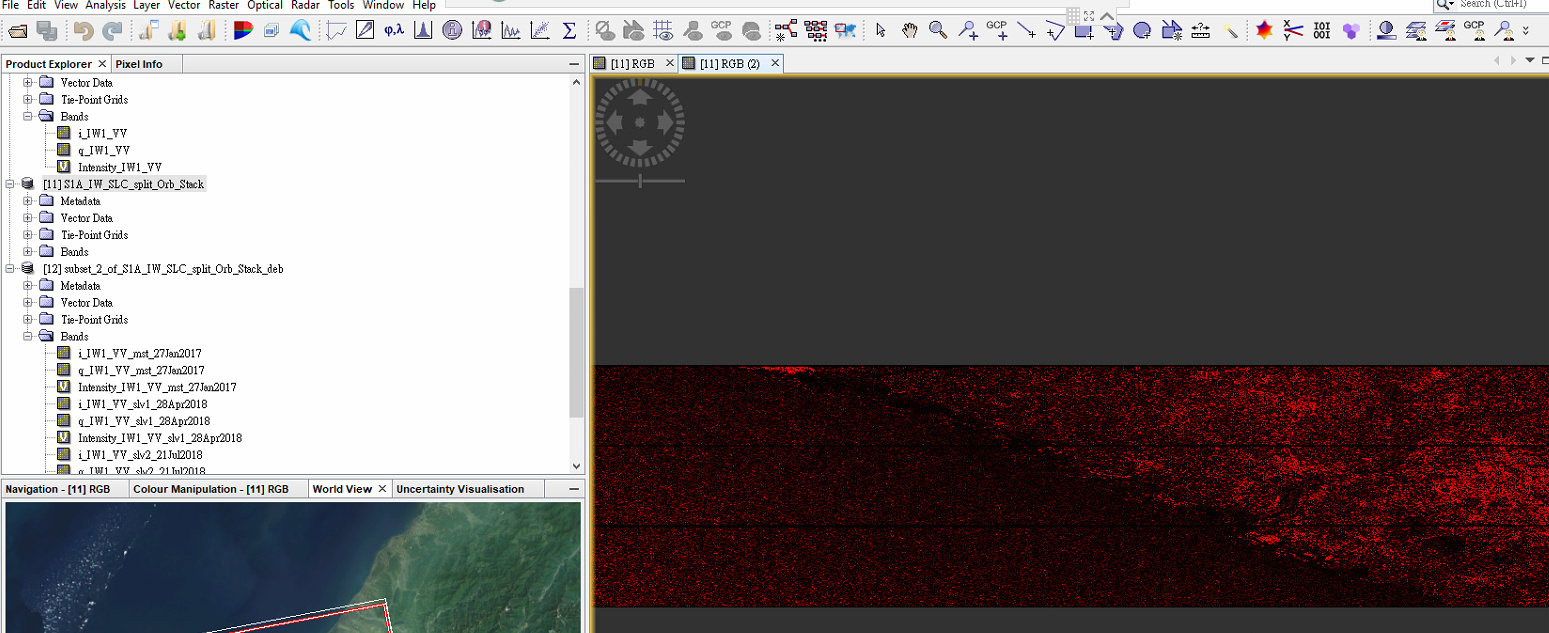
Hi ABraun, firstly thank you so much for your answer, I did try about your instruction (my Stack image show just red color, and I try other image include some of images before stacking all show red that not look the same with image in your link provided) is data have problem or from my processing (I did try again four times are the same result)
what should I do for this problem ?
Hi mdelgado, Thank you so much for your great document and I have read your paper (you mentioned the automatic processing chain process more than 160 sentinel 1A image ) that’s very big number is that we using this tool to process all image in 1 time ?? do you know where can I find a web can download image faster because in https://scihub.copernicus.eu/dhus/#/home take long time to download 1 image.
Second, in installation your package (in my computer I already install Python 3.6 configure with snap image below ) we do not need to install Linux system my computer run in window system? and also do we need
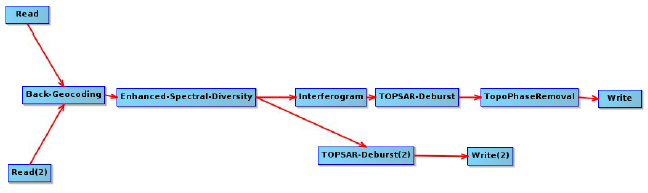
The goal of my questions was to draw your attention to the processing sequences, for instance in your case to avoid any error, I’d suggest step by step process for each single product,
Split ----》apply orbit------》TOPSAR CORR-----》backgeocoding (S1 TOPS GEOCODING)------》Apply ESD------》DEBURST-----》EXPORT TO STAMPS
THE second item you need to be exported to Stamps, is
Start from ESD step to create INFGRM ADD LONG AND LAT BY CHECKING THE BOX------》DEBURST -----》EXPORT TO STAMP
In this case you would avoid any source of error, many steps could be done at once , but I’d prefer step by step.
Hi @Tranrick,
In the package user manual it is written as requirements python 2.7 (with pathlib package) and SNAP 6.0.0 or superior. Reading the manual you will see that you only need:
1)download all the S1 data and put it inside PROJECT/slaves folder compressed (zip files)
2) to set up the master (splitting it over the AOI)
3) set the parameters inside the file project.conf and ,
4) running the steps
@ABraun uses it on Windows, so there is no need to install linux inside the windows machine, at least for the snap2stamps processing. For the StaMPS part you should have other things in consideration (@ABraun can point you some threads on that)
For downloading S1 images you have alaska vertex, cnes-pep and scihub. Good luck with them! Normally I jump from one to another finding the data or the fastest download speed, but this is normally changing.
I hope this helps!
Of course you set all colors in the RGB to three different dates. This tells you which of them is maybe missing.
Alternatively, you can simply open all intensities after creating the stack and check if they all contain data.
As for snap2stamps on Windows, there are not much things different. I can provide you my config file to compare later this week (currently not in my office).
Hi Andy,
For step by step preparing data in SNAP 2 STAMPS, which is better to implement create STACK after DEBURST of ESD backgeocoded image and same to infgm?, or to create STACK after implemented backgeocoding for all pairs and then apply ESD and DEBURST?
ALSO TO check the box LAT and long for each single infgm?
well, if you use the snap2stamps scripts, you don’t need to make any decisions because it does all the work for you in an order that works.
If you want to do the same steps manually, I advise to stick to this order:
source: manual
as for the lat, lon and dem bands, snap2stamps creates them for each interferogram but in the end, the stamps export needs them only one time.
Do you mean the python script?
Yes, snap2stamps is the python script developed by @mdelgado to automate all these steps by calling the snap functionalities in a correct order.
Yes, I read the manual it is quite good work, but I’m doing now step by step avoiding any unwanted error, So create STACK for DEBURST ESD, and same to infgm , it is possible to be the last step? to compile all the products in separate files then export to Stamps.
the stamps export only takes debursted stacks - one with the original intensities, the other as processed interferograms
Following the steps on the snap2stamps manual you should not get errors, unless the configuration on the project.conf is incorrect or data corrupted.
Still, surely I suggest you to do everything step by step so you can learn what it is done in each operator…
But if you need something fast and good, you know where to get the snap2stamps
I really think so, I have no objection
I installed python 2.7, and as recommended in the manual to install the following modules,
following python modules: os, sys, pathlib, shutil, glob, subprocess, shlex, time
I got this error,
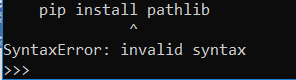
the path where PIP was installed (probably Python27\Scripts) has to be included in your system’s PATH variable. .
is this modules the same of pathlib?
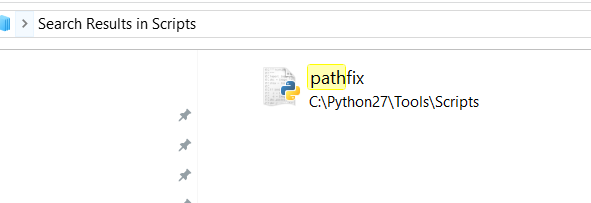 ,
,
since pathlib is not available with scripts folder.